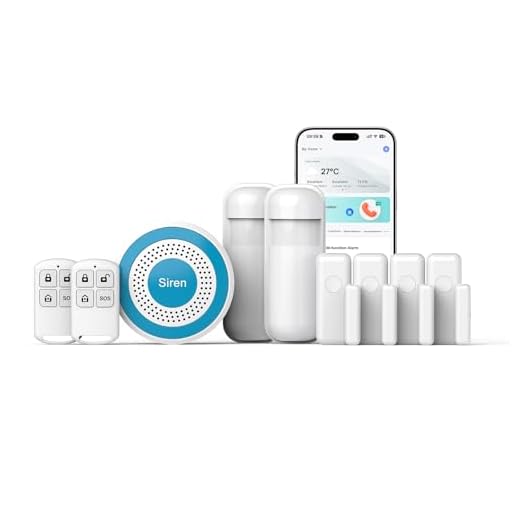
- Key Takeaways
- Understanding the Core Components of a Smart Security System
- Choosing the Right Smart Locks for Entry Point Protection
- Key Smart Lock Features
- Installation and Compatibility Considerations
- Setting Up Video Doorbells and Outdoor Cameras for Perimeter Monitoring
- Installing Indoor Cameras and Motion Sensors for Complete Coverage
- Strategic Camera Placement Tips
- Motion Sensor Configuration Settings
- Integrating Devices With Apps
- Configuring Smart Alerts and Notifications Across Your Devices
- Creating Automation Rules and Schedules for Seamless Security
- Integrating Your Security Devices With Smart Home Hubs and Voice Assistants
- Maintaining and Optimizing Your Automated Security System
- Frequently Asked Questions
- What Happens to My Smart Security System During a Power Outage?
- Can Renters Install Smart Security Devices Without Damaging Their Apartment?
- How Much Does a Complete Smart Home Security System Typically Cost?
- Are Smart Security Devices Vulnerable to Hacking or Cyber Attacks?
- Do Smart Security Systems Work Without a Monthly Subscription Fee?
- Conclusion
- Related Reading
- Related Reading
 Tapo
Tapo 

 TP-Link Matter Supported Smart Plug” />
To automate your home security, you’ll need a central hub that supports Z-Wave, Zigbee, or Matter protocols to unify your sensors, cameras, and smart locks. Install motion detectors at 10-15 feet range, position outdoor cameras at 9-12 feet high with IP66-rated housings, and configure door/window contacts to trigger automated responses. Set up geofencing for arm/disarm sequences and program lighting circuits to simulate occupancy. Verify your smart lock meets ANSI/BHMA Grade 1 standards with AES 128-bit encryption. The sections below explain ideal sensor placement and advanced automation configurations.
Key Takeaways
- Select a central controller supporting Z-Wave, Zigbee, or Matter protocols to integrate motion detectors, door/window sensors, and smart cameras seamlessly.
- Install smart locks with AES 128-bit encryption and pair with video doorbells featuring 1080p resolution for comprehensive entry point monitoring.
- Configure geofencing to automatically arm/disarm the system based on GPS location and trigger lighting to simulate occupancy when away.
- Set motion sensors to activate cameras and illuminate pathways, while linking smoke detectors to unlock emergency exits automatically.
- Customize push notifications by sensor type and threat level, maintaining logs to identify patterns and refine automation rules quarterly.
Understanding the Core Components of a Smart Security System

A thorough smart security system integrates four foundational components: sensors, controllers, communication protocols, and user interfaces.
You’ll need motion detectors, door/window contacts, and glass-break sensors as your primary detection layer. These security system components transmit data to a central controller—your command hub that processes inputs and executes automated responses.
Your controller must support industry-standard protocols like Z-Wave, Zigbee, or Matter to guarantee cross-device compatibility. You’re establishing a network that demands reliability, not proprietary limitations.
The user interface grants you system control through dedicated panels, smartphone applications, or voice commands. You’ll configure automation rules, receive real-time alerts, and monitor live feeds from this access point.

Smart home essentials require professional-grade installation practices: hardwired sensors for critical entry points, backup power supplies, and encrypted communication channels.
You’re building a fortress, not a convenience feature. Deploy redundant systems for failure-critical zones, and verify each component’s integration before declaring operational status.
Modern security solutions now include smart video search capabilities that help you quickly locate specific events within recorded footage, making incident investigation more efficient than traditional manual review methods.
Choosing the Right Smart Locks for Entry Point Protection
When selecting smart locks for your entry points, you’ll need to evaluate essential features including encryption protocols (AES 128-bit minimum), backup power options, and auto-lock timing configurations.
Verify that your chosen locks support your existing door hardware specifications—backset measurements, bore hole dimensions, and strike plate compatibility are critical for proper installation.
Additionally, confirm integration capability with your home automation protocol (Z-Wave, Zigbee, or Wi-Fi) and check whether your door thickness falls within the manufacturer’s supported range of 1-3/8″ to 1-3/4″.
For comprehensive security coverage, consider pairing your smart locks with complementary devices like smart video doorbells that offer fast notifications and help eliminate potential blind spots around your entry points.
Key Smart Lock Features
Smart lock selection requires evaluating several critical specifications that directly impact your home’s security posture and system integration capabilities.
Prioritize ANSI/BHMA Grade 1 certification for maximum resistance against forced entry. You’ll need keyless entry systems supporting multiple authentication methods—biometric scanners, PIN codes, and encrypted smartphone access.
Verify compatibility with your existing deadbolt backset measurements (typically 2-3/8″ or 2-3/4″) and door thickness specifications.
Integration protocols matter greatly. Z-Wave Plus and Zigbee 3.0 guarantee reliable mesh network performance, while Wi-Fi-enabled models provide direct cloud connectivity for smart notifications.
Battery backup systems prevent lockouts during power failures. Auto-lock timers, tamper alerts, and access logs deliver thorough monitoring capabilities.
Select models offering AES-128 encryption minimum to protect against digital intrusion attempts.
Installation and Compatibility Considerations
Beyond feature specifications, proper installation demands precise attention to your door’s physical characteristics and existing hardware configuration.
You’ll encounter installation challenges if your door thickness, backset measurement, or bore hole dimensions don’t align with manufacturer specifications. Compatibility issues arise when integrating with existing deadbolts or non-standard door preparations.
Address these critical factors:
- Door thickness requirements – Verify your door falls within the 1-3/8″ to 1-3/4″ range most locks accommodate.
- Backset measurement – Confirm 2-3/8″ or 2-3/4″ spacing from door edge to bore center.
- Cross-bore diameter – Confirm existing holes match the required 2-1/8″ standard.
- Strike plate alignment – Validate frame preparation accepts the lock’s strike configuration.
You’ll need precise measurements before purchasing to avoid costly returns or professional modification services.
Setting Up Video Doorbells and Outdoor Cameras for Perimeter Monitoring

Mapping out your property’s vulnerable entry points marks the critical first step in deploying an effective video surveillance perimeter. Document all access points—front, rear, side entrances, garage doors, and ground-level windows—then prioritize coverage based on threat probability and asset value.
Essential video doorbell features include 1080p minimum resolution, 160-degree field of view, two-way audio with noise cancellation, and person detection algorithms. Install at 48 inches height for ideal facial capture, ensuring the camera angle covers the three-foot approach zone. Wire doorbells to your transformer’s 16-24V AC output or select battery models with solar charging capability.
Strategic outdoor camera placement demands mounting heights between 9-12 feet to prevent tampering while maintaining facial recognition accuracy. Position cameras at 30-degree downward angles, overlapping coverage zones by 20% to eliminate blind spots.
Weatherproof housings must meet IP66 ratings minimum. Integrate all devices with your central hub for unified monitoring and automated threat response protocols.
Installing Indoor Cameras and Motion Sensors for Complete Coverage
After securing your home’s perimeter with outdoor cameras and video doorbells, you’ll need to establish thorough interior monitoring through strategic placement of indoor cameras and motion sensors.
Your indoor security layer requires careful consideration of camera field-of-view angles, sensor detection zones, and ideal mounting heights to eliminate blind spots while maintaining privacy in sensitive areas.
Proper configuration of motion sensitivity thresholds and smooth app integration guarantees your devices work together as a unified system that alerts you to genuine security events.
Strategic Camera Placement Tips
Proper camera placement requires understanding sight lines, lighting conditions, and potential blind spots before you mount a single device.
Position cameras at entry points with ideal camera angles—mount 7-9 feet high, angled downward at 15-30 degrees for facial recognition. Test night vision functionality in actual darkness before finalizing placement.
Follow these strategic guidelines:
- Corner mounting enhances room coverage while minimizing tampering opportunities.
- Backlight avoidance prevents washout—position cameras perpendicular to windows, never facing them.
- Overlap zones between adjacent cameras eliminate dead spaces in critical areas.
- Power accessibility determines feasibility—verify outlet proximity or plan PoE cable runs before drilling.
Document your coverage map, marking each camera’s field of view. This guarantees thorough surveillance architecture and identifies vulnerabilities requiring additional sensors or repositioning.
Motion Sensor Configuration Settings
Once you’ve positioned your hardware, fine-tuning motion detection parameters prevents false alerts while maintaining security effectiveness.
Configure detection zones to exclude high-traffic areas like streets or swaying vegetation. Adjust sensor sensitivity settings based on your environment—reduce sensitivity in spaces with pets or HVAC airflow, increase it for perimeter monitoring.
Different motion sensor types require specific calibration: PIR sensors detect infrared heat signatures and perform efficiently at 10-15 feet, while microwave sensors penetrate walls and need precise range limiting.
Set detection delays between 30-60 seconds to prevent continuous triggering. Enable scheduling to reduce daytime sensitivity when you’re home.
Configure notification thresholds—you’ll want immediate alerts for entry points but batched reports for interior zones.
Test configurations systematically, walking through detection patterns at various speeds.
Integrating Devices With Apps
Hardware configuration alone won’t activate your security system—you’ll need to establish digital connections between physical devices and their control applications.
Device compatibility verification guarantees smooth integration across manufacturers and protocols.
Execute synchronization through these systematic steps:
- Download manufacturer-specific applications from verified sources and grant necessary permissions for network access.
- Enable Bluetooth and Wi-Fi simultaneously during initial pairing to establish dual-channel communication protocols.
- Scan QR codes or input device serial numbers to authenticate hardware and initiate app synchronization sequences.
- Configure push notifications and alert parameters within application settings to match your security requirements.
Test each connection by triggering sensors manually.
Verify real-time data transmission between devices and applications.
Update firmware immediately to maintain security protocols and guarantee peak performance across your integrated network.
Configuring Smart Alerts and Notifications Across Your Devices
How do you guarantee your home security system reaches you with critical alerts when they matter most? Configure notification preferences across all integrated devices to establish redundant communication channels. Set push notifications as your primary alert method, with SMS and email as backup protocols.
Implement alert customization by defining specific triggers for each sensor type. Motion detectors warrant immediate notifications, while door sensors might employ delayed alerts to prevent false alarms during authorized entry.
Configure priority levels—critical alerts for intrusion attempts, standard notifications for routine events.
Access your system’s notification settings and assign unique alert tones to different threat levels. This enables instant recognition without checking your device. Enable location-based notifications to adjust sensitivity when you’re away versus home.
Test your configuration systematically. Trigger each sensor individually and verify delivery across all platforms. Document response times and adjust redundancy protocols accordingly.
Maintain notification logs to identify patterns and refine your alert parameters for peak system performance.
Creating Automation Rules and Schedules for Seamless Security

Beyond alert configuration, automated security rules convert reactive monitoring into proactive protection.
You’ll establish sturdy defense layers by implementing automation triggers that respond to specific conditions and events across your integrated ecosystem.
Deploy scheduling routines through your central hub to orchestrate synchronized security responses:
- Geofencing protocols: Trigger arm/disarm sequences based on your smartphone’s GPS coordinates, eliminating manual system control while maintaining perimeter integrity.
- Temporal automation: Program lighting circuits to simulate occupancy during predetermined intervals, deterring surveillance-based threats through randomized patterns.
- Sensor-driven cascades: Configure door/window sensors to activate cameras, disable smart latches, and illuminate pathways simultaneously when breaches occur.
- Environmental conditions: Link smoke detectors to open emergency exits and trigger exterior lighting for first responder navigation.
You’ll maintain compliance with ANSI/SIA CP-01-2019 standards while creating rule hierarchies that prevent conflicts.
Test automation sequences quarterly to verify trigger reliability and response timing.
Integrating Your Security Devices With Smart Home Hubs and Voice Assistants
While automation rules establish your security foundation, central hub integration converts disparate devices into a unified command infrastructure.
You’ll need to verify protocol compatibility—Z-Wave, Zigbee, Wi-Fi, or Matter—before connecting cameras, sensors, and locks to platforms like SmartThings, Home Assistant, or Hubitat.
Hub compatibility issues frequently arise when manufacturers implement proprietary protocols. Resolve these by deploying protocol bridges or selecting devices with multi-protocol support.
Configure device handlers and drivers within your hub’s interface, ensuring firmware versions align with platform requirements.
Voice control integration demands explicit command structures. Program Alexa, Google Assistant, or Siri with security-specific routines: “Arm perimeter defenses” triggers door locks, enables motion sensors, and activates exterior cameras simultaneously.
Implement two-factor authentication for voice commands controlling entry points—preventing unauthorized access through audio playback attacks.
Map device endpoints to hub zones for granular control. This architecture enables cross-platform automation: motion detection triggers recording, sends notifications, and adjusts lighting through single-event cascades.
Maintaining and Optimizing Your Automated Security System

Once your integrated security infrastructure becomes operational, systematic maintenance protocols prevent degradation and security vulnerabilities.
You’ll maintain peak performance through disciplined oversight and proactive refinement.

Essential Maintenance Procedures:
- Execute system updates immediately – Install firmware patches within 24 hours of release to eliminate exploitable weaknesses and improve device functionality.
- Conduct quarterly security audits – Review access logs, verify encryption protocols, and test failover mechanisms to identify compromised credentials or unauthorized access attempts.
- Calibrate sensor thresholds – Adjust motion detector sensitivity and camera zones based on false-positive data to enhance threat detection accuracy.
- Validate backup systems monthly – Test battery reserves, cellular failover connections, and cloud storage integrity to guarantee continuity during primary system failures.
Document all maintenance activities in timestamped logs. Replace deprecated hardware before manufacturer support expires.
Monitor network traffic for anomalous patterns indicating device compromise.
You’ll maximize your security investment through consistent, methodical system oversight rather than reactive troubleshooting.
Frequently Asked Questions
What Happens to My Smart Security System During a Power Outage?
Your smart security system’s functionality depends on its power backup configuration.
Without an uninterruptible power supply (UPS) or battery backup, you’ll lose camera feeds, motion detection, and security alerts during outages.
Install a UPS rated for your system’s wattage to maintain continuous operation.
Confirm your router and modem also have power backup, as internet connectivity’s essential for remote monitoring and alert notifications.
Professional-grade systems include integrated battery backups meeting UL standards for 24-hour minimum runtime.
Can Renters Install Smart Security Devices Without Damaging Their Apartment?
You don’t need landlord permission for most installations.
You’ll find numerous renter-friendly options requiring zero permanent modifications. Deploy removable devices like adhesive-mounted door sensors, freestanding cameras, and pressure-sensitive window alarms that leave surfaces intact.
Install smart locks that replace existing deadbolts without drilling—you’ll simply reinstall originals upon move-out.
Utilize command strips, tension rods, and magnetic mounts to establish extensive coverage.
You’re maintaining full deposit protection while commanding professional-grade security monitoring capabilities throughout your rental space.
How Much Does a Complete Smart Home Security System Typically Cost?
You’ll invest $200-$600 for a basic DIY smart security setup, while professionally installed systems run $600-$2,500.
Average costs depend on your system components: cameras ($50-$300 each), smart locks ($150-$300), sensors ($20-$50), and hub/control panel ($100-$300).
Professional monitoring adds $15-$60 monthly.
You’re looking at $1,000-$3,000 for thorough coverage with multiple cameras, entry sensors, and automation integration.
Scale your investment based on property size and desired control capabilities.
Are Smart Security Devices Vulnerable to Hacking or Cyber Attacks?
Yes, you’re exposed to potential cyber attacks if you don’t implement proper cybersecurity measures.
Select devices featuring WPA3 device encryption and enable two-factor authentication immediately. You’ll minimize vulnerabilities by creating unique passwords, installing firmware updates promptly, and segmenting your IoT network.
Don’t rely on default settings—they’re your weakest point. Configure firewall rules, disable unused features, and verify UL 2900-1 compliance.
You control your system’s integrity through proactive security protocols.
Do Smart Security Systems Work Without a Monthly Subscription Fee?
Yes, you’ll find numerous subscription alternatives that deliver cost savings without compromising functionality.
Take Ring’s base tier—you can operate cameras locally without cloud storage fees. You’ll maintain live viewing, motion detection, and smartphone alerts. However, you’re sacrificing 60-day cloud retention and professional monitoring.
Install systems like Eufy’s HomeBase for complete local storage control. You’re eliminating recurring expenses while retaining core security features.
This approach enhances your investment’s value and grants you absolute operational autonomy over your security infrastructure.
Conclusion
Think of your smart security system as a digital fortress—each device a vigilant sentinel standing guard. You’ve now assembled your defensive perimeter: locks as gates, cameras as watchtowers, sensors as early-warning scouts. They’ll communicate through your hub’s command center, alerting you to breaches day or night. But remember, even the strongest castle requires maintenance. You’ll need to update firmware regularly, test sensors monthly, and verify backup power sources. Your automated fortress is only impenetrable when you’re actively maintaining its defenses.
🔗 Related From Our Network
🔌 Editor’s Pick
Editor’s Pick: A smart home hub that unifies your thermostat, plugs, lights, and doorbell into one seamless system.
Make Your Home Smarter
Device reviews, automations, and the deals worth grabbing.
Related Articles You Might Like