- Key Takeaways
- What Is Home Assistant and Why Choose It
- Hardware Requirements and Recommendations
- Installation Methods and Setup Options
- Initial Configuration and User Interface Navigation
- Integrating Smart Home Devices and Services
- Creating Your First Automations and Scenes
- Understanding Automation Basics
- Morning Routine Scene
- Motion-Triggered Lighting
- Advanced Features and Customization Options
- Dashboard Customization Tricks
- Scenes and Automations
- Security Best Practices and Remote Access
- Frequently Asked Questions
- Can Home Assistant Run on Battery Power?
- How Much Network Bandwidth Does Home Assistant Typically Consume?
- Can I Migrate From Smartthings to Home Assistant Easily?
- Does Home Assistant Work Offline Without Internet Connection?
- How Often Should I Back up My Home Assistant Configuration?
- Conclusion
- Related Reading

Home Assistant gives you complete control over your smart devices through an open-source platform that runs locally on your network. Start by choosing hardware like a Raspberry Pi 4 or dedicated Home Assistant Yellow device, then install using one of four methods: OS, Container, Supervised, or Core. After the initial setup wizard, connect your smart devices through integrations and create automations that work even during internet outages. The following guide will walk you through each essential step of your smart home journey.
Key Takeaways
- Choose hardware based on your needs: dedicated devices (HA Yellow/Blue), Raspberry Pi 4, or repurposed computers with sufficient RAM.
- Install Home Assistant using one of four methods: Home Assistant OS, Container, Supervised, or Core depending on your technical requirements.
- Complete the initial setup via the onboarding wizard to configure essential settings and create your user account.
- Add your smart devices through integrations by selecting manufacturers from the list and following authentication steps.
- Create automations to control devices based on triggers like time, presence detection, or environmental conditions.
What Is Home Assistant and Why Choose It
While many smart home ecosystems lock users into proprietary platforms, Home Assistant stands apart as an open-source home automation platform that runs locally on your network. This privacy-focused solution keeps your data in your home rather than on corporate servers, giving you complete control over your smart devices and automation rules.
Home Assistant empowers users with open-source freedom, keeping smart home data local and control firmly in your hands.
Home Assistant’s modular architecture allows you to integrate virtually any smart device regardless of manufacturer—from lighting and climate control to security systems and entertainment devices. You’ll appreciate the flexibility to mix brands without compatibility concerns.
The open source ecosystem surrounding Home Assistant means continuous improvement through community contributions. Developers regularly add new integrations and features, ensuring the platform evolves faster than commercial alternatives.
You’ll benefit from Home Assistant’s local processing, which means your automations continue working even when your internet connection fails—a critical advantage over cloud-dependent systems that become useless during outages.
Hardware Requirements and Recommendations
The three main hardware options for running Home Assistant include dedicated devices, single-board computers, and repurposed PCs—each offering different performance levels and ease of setup. Your choice depends on the complexity of your smart home system and technical comfort level. Home Assistant requires minimal specifications but benefits from faster processors and additional RAM when controlling numerous compatible devices.
- Dedicated Hardware – Home Assistant Yellow ($149) and Blue ($140) offer plug-and-play solutions with optimized performance and pre-installed software. Power requirements are minimal at 5-10W.
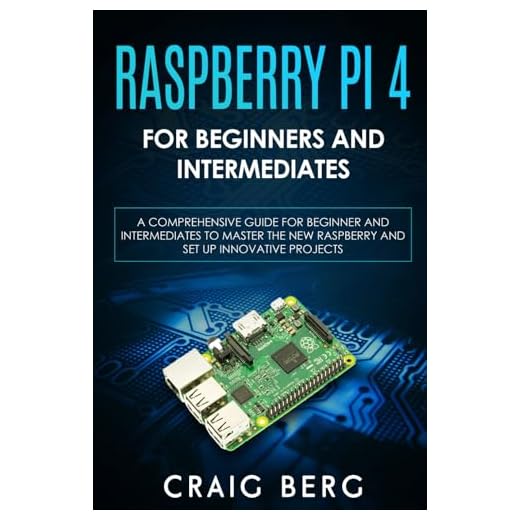
- Raspberry Pi Options – Pi 4 (2-8GB RAM) provides excellent performance-to-cost ratio. Requires microSD card (32GB+ recommended), power supply (3A), and case. Consumes approximately 2-5W.
- Repurposed Computers – Old laptops or mini PCs with minimum 2GB RAM and dual-core processors work well. Higher power requirements (15-30W) but offer superior processing for complex automations.
Installation Methods and Setup Options

Setting up Home Assistant boils down to four primary installation methods, each catering to different user needs and technical expertise. Home Assistant OS offers the most streamlined approach with a dedicated operating system that runs on Raspberry Pi or x86-64 hardware. Home Assistant Container provides flexibility through Docker, ideal if you’re running other services on the same machine. Home Assistant Supervised gives you full functionality while running on your existing Debian-based OS. For advanced users, Home Assistant Core can be installed directly in a Python virtual environment.
Whichever method you choose, implement proper backup procedures immediately. The built-in snapshot feature allows you to create complete system backups that can be stored locally or in cloud services. Additionally, configure system monitoring to track resource usage and receive alerts about potential issues. These proactive measures guarantee your smart home automation remains reliable and recoverable should hardware problems arise.
Initial Configuration and User Interface Navigation
Once Home Assistant completes installation, you’ll encounter the onboarding wizard that guides you through essential first-time setup procedures. This process includes creating your administrator account, naming your home, and setting your location and unit system preferences. After completing onboarding, you’ll land on the default dashboard where you can begin user interface optimization.
The Home Assistant interface consists of several key sections that you’ll need to navigate efficiently:
- Sidebar – Contains main navigation elements including dashboards, map, logbook, history, and configuration options
- Dashboard – Displays your devices and automations in customizable cards that support dashboard personalization through different views
- Configuration Panel – Accessed through the sidebar, this area allows you to integrate devices, create automations, and modify system settings
You’ll find most interface elements intuitive, but exploring the configuration documentation helps maximize functionality. Focus initially on adding integrations for your existing smart devices before advancing to more complex automations.
Integrating Smart Home Devices and Services

After completing the initial configuration, you’ll need to integrate your smart home devices and services with Home Assistant to establish centralized control. Navigate to Configuration > Integrations and click the “+” button to browse available integrations. Home Assistant supports hundreds of protocols and brands including Zigbee, Z-Wave, and WiFi-based devices.
For smart device integration, select your device manufacturer from the list and follow the authentication steps. Most devices require network discovery or API credentials. Home Assistant will scan your network for compatible devices automatically when possible.
After connecting devices, create automation routines that implement energy efficiency strategies. For example, configure smart thermostats to adjust based on occupancy or program lights to dim during peak energy hours.
When integrating cloud-based services, consider using local alternatives when available to maintain functionality during internet outages and enhance privacy. Test each integration thoroughly to verify proper communication between Home Assistant and your devices.
Creating Your First Automations and Scenes
Automations in Home Assistant transform your connected devices from passive gadgets into a responsive, intelligent system through triggers, conditions, and actions. You’ll start with a Morning Routine scene that can simultaneously adjust lights, temperature, and play your favorite news podcast with a single command. Motion-triggered lighting represents an essential automation that enhances both convenience and security by automatically illuminating spaces when you enter and turning off lights in vacant rooms.
Understanding Automation Basics
While smart devices provide immediate control, the true power of Home Assistant emerges when you implement automations and scenes. Automations respond to specific triggers, executing actions automatically when conditions are met. Automation scheduling allows you to set time-based events, such as turning on lights at sunset or activating your coffee maker at 6 AM.
Home Assistant’s automation engine consists of three key components:
- Triggers – Events that initiate an automation (state changes, time patterns, webhook calls)
- Conditions – Optional checks that determine if an automation should proceed (time of day, device state)
- Actions – The tasks executed when triggered (turn devices on/off, send notifications, call services)
Understanding these components enables you to create sophisticated automations that transform individual smart devices into a cohesive, intelligent system.
Morning Routine Scene
Name your scene “Morning Routine” and select the devices you want to control—typically lights, thermostat, and perhaps smart blinds. For each device, specify its desired state (brightness level, temperature setting).
Configure morning routine triggers by determining activation methods. Options include time-based triggers (7:00 AM weekdays), motion detection, or manual activation via voice assistant or dashboard button.
Morning routine customization allows personalization based on your preferences. Consider creating variants for weekdays versus weekends, adjusting light intensity based on weather conditions, or integrating with your calendar to modify routines on meeting days.
Motion-Triggered Lighting
How efficiently can you eliminate manual light switches with properly configured motion detection? Home Assistant’s automated lighting control responds to occupancy through strategic sensor placement and customized triggers. Configure your system to detect presence and manipulate connected bulbs accordingly, while maintaining guest user profile settings for visitors.
- Set up motion sensors in key areas (hallways, bathrooms, kitchen) with appropriate timeout values—60 seconds for transit zones, 5-10 minutes for living spaces
- Create automation rules using Node-RED or YAML configurations that specify conditions like time of day and ambient light levels
- Implement fallback protocols for sensor failures using binary sensors that trigger notification alerts if motion isn’t detected within expected timeframes
Tune sensitivity settings to prevent false triggers from pets or outdoor movement through windows, ensuring reliability while maximizing energy efficiency.
Advanced Features and Customization Options
Home Assistant offers extensive customization capabilities through its dashboard system, allowing you to craft interfaces that perfectly match your workflow. You’ll find powerful tools for creating dynamic scenes that adjust multiple devices simultaneously and sophisticated automations that can respond to complex triggers. These advanced features enable you to transform your smart home from a collection of devices into a cohesive, responsive system that anticipates your needs.
Dashboard Customization Tricks
Numerous advanced customization options exist within Home Assistant’s dashboard that can transform a basic interface into a powerful command center tailored to your specific needs. The system’s flexible architecture allows for precise widget placement and creation of unique dashboard layouts that match your control preferences.
- Strategic Widget Grouping – Organize related components into logical clusters using vertical and horizontal stacks to maximize screen real estate while maintaining functional relationships between controls.
- Conditional Cards – Implement dynamic elements that appear or change based on specific triggers, time of day, or system states to display only relevant information when needed.
- Custom CSS Theming – Apply targeted styling modifications through YAML configuration to adjust colors, spacing, and visual elements beyond the standard themes for a personalized interface experience.
Scenes and Automations
Moving beyond interface aesthetics, the true power of Home Assistant lies in its automation capabilities that transform passive monitoring into proactive system intelligence. You’ll find two primary tools for this purpose: scenes, which capture device states, and automations, which execute actions based on triggers.
To create effective automations, define custom scene triggers that respond to specific conditions like temperature thresholds or presence detection. Navigate to Configuration → Automations & Scenes, then select “Add Automation” to establish your logic chain of trigger-condition-action sequences.
Consider implementing scheduling maintenance tasks such as regularly backing up your configuration or notifying you when device batteries run low. These preventative measures guarantee system reliability while demonstrating Home Assistant’s versatility beyond simple device control, establishing a truly intelligent home environment that anticipates needs rather than merely responding to commands.
Security Best Practices and Remote Access

While convenience remains a key advantage of smart home systems, security must never be compromised when implementing Home Assistant, especially when configuring remote access capabilities. Establishing proper safeguards protects your personal data and prevents unauthorized control of your devices.
Security is non-negotiable in smart home automation—protect your system as diligently as you enjoy its convenience.
- Implement encrypted remote access through Home Assistant Cloud or by setting up a reverse proxy with Let’s Encrypt certificates, ensuring all communications remain protected from interception.
- Enable multifactor authentication immediately after installation to add an essential security layer beyond passwords, reducing vulnerability to credential-based attacks.
- Create a dedicated user account for each person accessing your system, assigning appropriate permission levels to limit potential damage from compromised credentials.
When configuring remote access, always use unique, complex passwords and regularly update your Home Assistant instance to patch security vulnerabilities. Consider implementing network segregation by placing your smart devices on a separate VLAN from your primary network.
Frequently Asked Questions
Can Home Assistant Run on Battery Power?
Yes, you can achieve battery powered operation with Home Assistant. Choose energy efficient hardware like Raspberry Pi Zero or low-power SBCs. Your runtime will depend on battery capacity and device power consumption.
How Much Network Bandwidth Does Home Assistant Typically Consume?
Home Assistant’s network bandwidth requirements are minimal—typically 50-100MB daily for basic operations. Your internet connectivity needs primarily depend on cloud integrations, remote access usage, and how many devices you’re controlling simultaneously.
Can I Migrate From Smartthings to Home Assistant Easily?
While you’ll face compatibility challenges with certain devices, you can migrate from SmartThings to Home Assistant with reasonable effort. The migration process requires methodical planning and device re-pairing, but most SmartThings devices work well post-transition.
Does Home Assistant Work Offline Without Internet Connection?
Yes, Home Assistant functions offline without internet connectivity. You’ll experience offline mode limitations with cloud-dependent devices. Your system needs adequate offline data storage requirements for logs and historical data. Local control remains fully operational.
How Often Should I Back up My Home Assistant Configuration?
You should back up your Home Assistant configuration weekly and after significant changes. Storage requirements are minimal, typically under 100MB for configurations. Consider automating backups to guarantee consistent protection of your smart home setup.
Conclusion
You’ve now established a thorough Home Assistant environment for full control over your smart home ecosystem. By implementing the security measures outlined, you’ve joined the 300,000+ active monthly users who maintain sovereignty over their data. When properly configured, Home Assistant’s local processing delivers command execution in under 50ms—dramatically outperforming cloud-based alternatives while ensuring your privacy remains intact regardless of internet connectivity status.
🔌 Editor’s Pick
Editor’s Pick: USB-powered smart hub for connecting your smart thermostat, plugs, lights, and doorbell.
Make Your Home Smarter
Device reviews, automations, and the deals worth grabbing.
Related Articles You Might Like