


You can change your home in a weekend by installing a smart thermostat for 10-23% energy savings, setting up voice-controlled lighting systems that cut consumption by 60%, or adding a video doorbell for real-time security monitoring. Other accessible projects include smart locks with keyless entry, automated window blinds programmed to temperature thresholds, and motion-activated lighting for high-traffic areas. Each installation typically requires only basic tools and completes in under four hours, with immediate functionality. The following guide breaks down each project’s technical requirements and implementation steps.
Key Takeaways
- Smart thermostats install in under 30 minutes and provide immediate 10-23% energy savings on heating and cooling costs.
- Smart lighting systems reduce energy consumption by 60% with automated scheduling, geofencing, and voice control integration capabilities.
- Video doorbells mount at 48 inches in minutes, offering real-time visitor verification, motion recording, and two-way audio communication.
- Smart locks install with only a screwdriver in 30 minutes, providing keyless entry via PIN, smartphone, or biometric authentication.
- Motion-activated lighting deploys quickly with sensors mounted at 7-8 feet, automatically illuminating hallways and staircases for enhanced safety.
Install a Smart Thermostat to Optimize Energy Usage
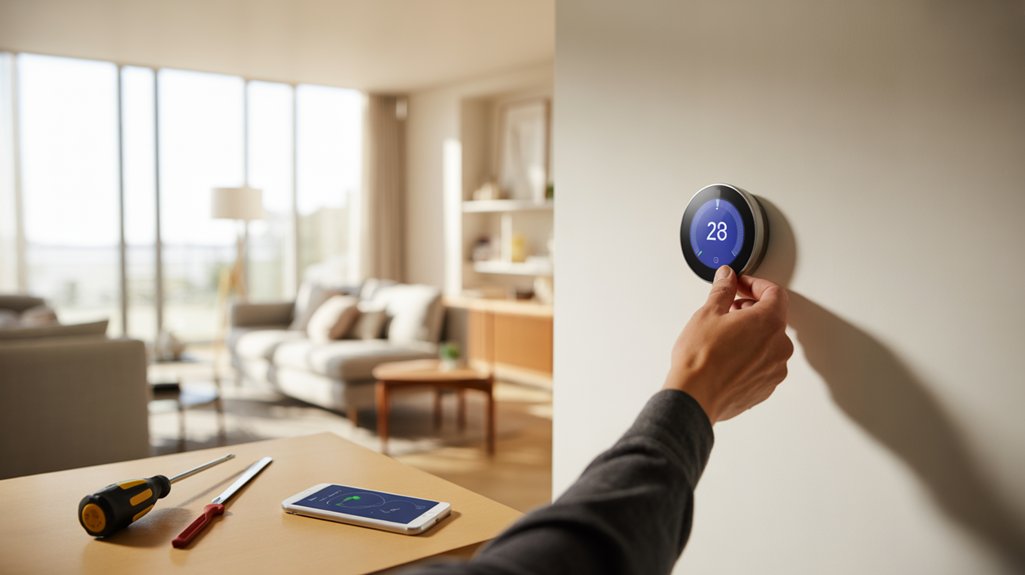
Smart thermostats represent one of the most impactful entry points into home automation, delivering immediate energy savings of 10-23% on heating and cooling costs.
You’ll gain precise control over energy consumption through learning algorithms that adapt to your schedule and preferences automatically.
Modern thermostat features include geofencing capabilities that detect when you’re away, multi-zone temperature management, and real-time energy monitoring dashboards.
You can implement installation in under two hours by following manufacturer protocols: shut off HVAC power at the breaker, remove your existing thermostat, photograph wire configurations, and connect corresponding wires to your new device’s labeled terminals.
Configure Wi-Fi connectivity through the companion app, then calibrate temperature sensors and set operational parameters.
Advanced models integrate with voice assistants and provide granular analytics on consumption patterns.
You’ll enhance performance by establishing automated schedules, setting temperature thresholds, and leveraging predictive heating and cooling cycles that anticipate your needs while minimizing waste.
Smart thermostats work seamlessly with additional smart home devices like sensors and cameras to create comprehensive whole home automation and monitoring systems.
Set up Smart Lighting With Automated Schedules
By implementing automated lighting systems, you’ll reduce energy consumption by up to 60% while establishing granular control over ambiance, security, and daily routines.
Smart bulb options range from basic Wi-Fi-enabled units to advanced Zigbee and Z-Wave models that integrate effortlessly with existing home automation protocols.
Select bulbs supporting 16 million lighting color customization variants for maximum flexibility in creating mood-specific environments.
Configure scheduling through your chosen platform’s mobile application. Program wake-up sequences with gradual brightness increases, simulate occupancy during travel, and trigger lights based on sunset calculations rather than static times.
Implement geofencing to activate lighting upon arrival and deactivate when you’re away.
Integrate motion sensors in low-traffic areas like hallways and bathrooms for automated activation. Connect smart switches to control non-smart fixtures while maintaining manual override capabilities.
Advanced users should utilize IFTTT protocols or Home Assistant for complex automation chains linking lighting responses to weather conditions, calendar events, or security system states.
Consider room-specific lighting solutions as different spaces benefit from tailored approaches, whether you’re setting up mood lighting in the living room or implementing security features for outdoor areas.
Add a Video Doorbell for Enhanced Front Door Security
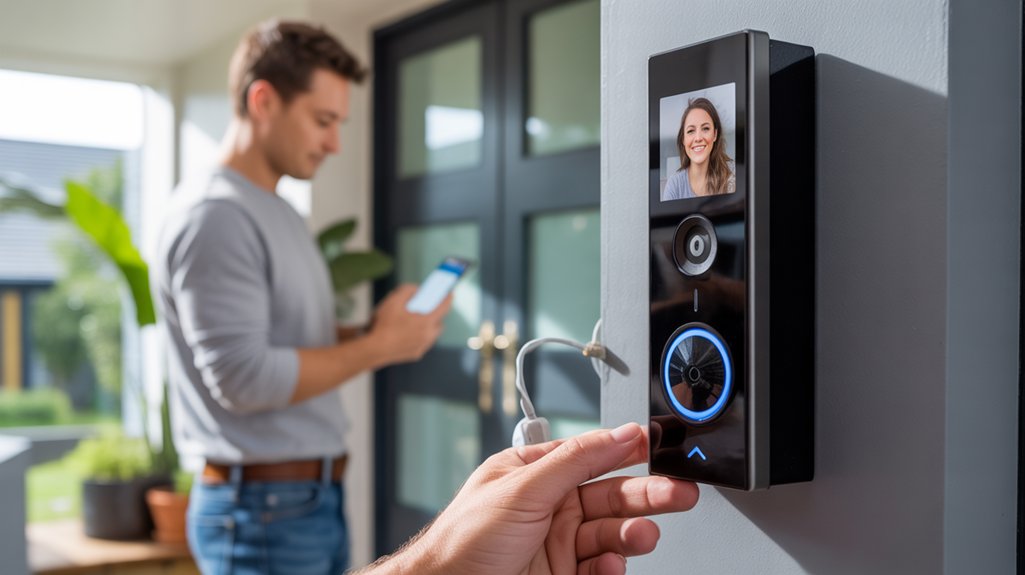
Video doorbells convert your entry point into a thorough surveillance station, delivering real-time visual verification of visitors, package deliveries, and potential security threats.
You’ll gain command over your home’s access point through motion-activated recording, two-way audio communication, and cloud storage integration.
Key video doorbell features you’ll utilize include night vision capabilities, customizable motion zones, and smartphone alerts that enable instant response from anywhere.
Night vision, customizable motion zones, and instant smartphone alerts deliver comprehensive monitoring and immediate response capability from any location.
Advanced models offer facial recognition and package detection algorithms that differentiate between routine activity and genuine concerns.
Installation tips for maximum effectiveness: mount your device at 48 inches height for ideal facial capture, confirm your Wi-Fi signal strength exceeds -50 dBm at the installation point, and hardwire to existing doorbell systems for uninterrupted power.
You’ll need a drill, level, screwdriver, and wire stripper.
Configure detection sensitivity to eliminate false alerts while maintaining thorough coverage.
Integration with your smart home ecosystem amplifies your security infrastructure’s responsiveness and control.
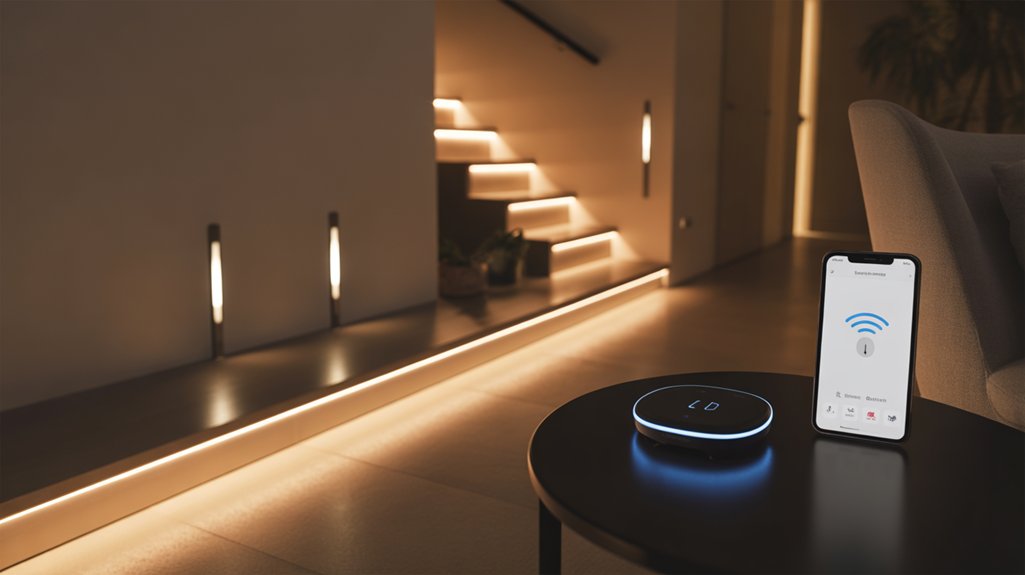
Create a Whole-Home Voice Control System
Voice-activated control converts disparate smart devices into a unified command ecosystem, enabling you to orchestrate lighting, climate, entertainment, and security through natural language directives.
Select your platform—Amazon Alexa, Google Assistant, or Apple HomeKit—based on smart home compatibility with your existing infrastructure. Deploy hub devices strategically: position echo dots or Google Nest Minis in high-traffic zones for ideal voice recognition coverage.
Configure voice assistant integration through manufacturer apps, grouping devices by room or function. Create custom routines that trigger multi-device sequences with single commands—”goodnight” can simultaneously lock doors, adjust thermostats, and extinguish lights.
Implement naming conventions that eliminate ambiguity. “Kitchen overhead” outperforms “light one” for precise control.
You’ll establish zone-based control hierarchies, enabling room-specific commands while maintaining whole-home authority.
Advanced users can integrate IFTTT protocols for cross-platform automation, expanding control beyond native ecosystems. This architecture positions you as the central command authority over your residential technology network.
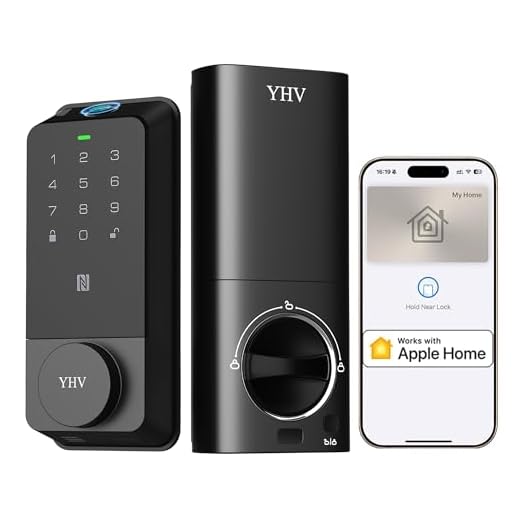
Install Smart Locks for Keyless Entry
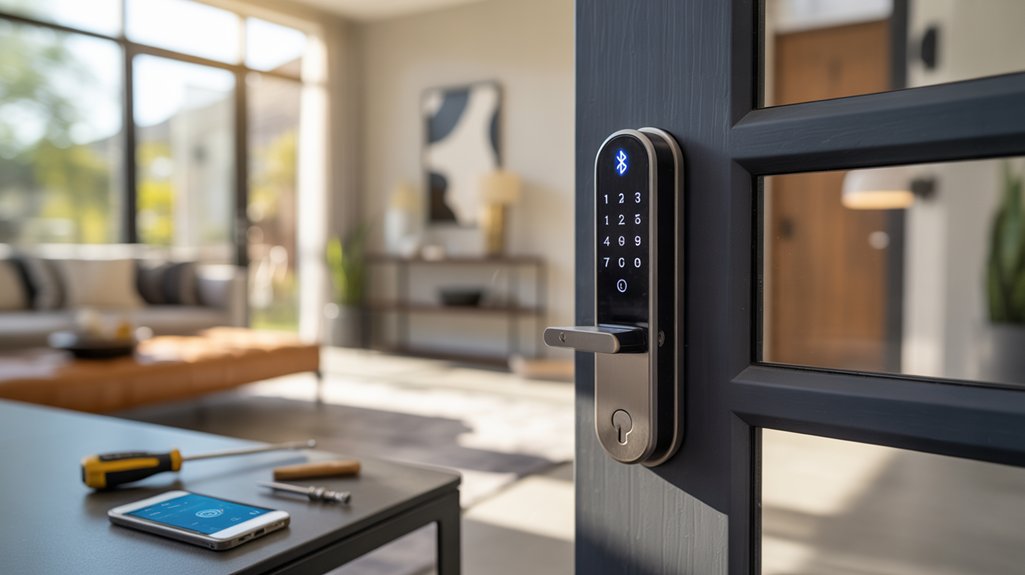
Smart locks eliminate physical key vulnerabilities while integrating smoothly with your voice control infrastructure.
You’ll gain keyless convenience through multiple authentication methods: PIN codes, smartphone apps, biometric scanners, and voice commands via your existing ecosystem.
Select locks featuring Z-Wave or Zigbee protocols for strong home automation integration. Schlage Encode and August Wi-Fi models offer direct connectivity without additional hubs. Yale Assure supports multiple wireless standards, maximizing compatibility.
Installation requires only a screwdriver. Remove your existing deadbolt, align the new smart lock components, and secure both interior and exterior assemblies. Connect power, configure your wireless settings, and program user codes. Most installations complete within 30 minutes.
Implement improved security through auto-lock scheduling, temporary access codes for guests, and real-time entry notifications.
You’ll monitor access logs remotely, revoke credentials instantly, and eliminate locksmith dependencies. Integration with security cameras creates thorough entry surveillance, placing complete access control directly in your hands.
Build a Smart Security Camera Network
While perimeter monitoring traditionally required professional installation and monthly fees, modern IP cameras enable you to construct an enterprise-grade surveillance system at consumer prices.
Today’s IP camera technology democratizes professional-grade security, delivering enterprise surveillance capabilities without installer dependencies or subscription overhead.
You’ll deploy multiple camera nodes strategically across your property, creating overlapping coverage zones that eliminate blind spots.
Strategic camera placement determines your system’s effectiveness:
- Entry points: Mount 4K cameras at doorways capturing facial details at 15-foot ranges
- Perimeter zones: Position wide-angle units along property boundaries with motion-triggered spotlight integration
- High-value areas: Install PTZ (pan-tilt-zoom) cameras monitoring safes, garages, and equipment storage
- Network backbone: Configure PoE switches delivering power and data through single cables
You’ll configure cloud backup redundancy and local NVR storage, ensuring footage survives tampering attempts.
Address privacy concerns by establishing camera-free zones in neighbor-facing areas and implementing geofencing that disables interior cameras when you’re home.
RTSP protocol integration enables unified monitoring across manufacturers, maximizing your hardware flexibility and system scalability.
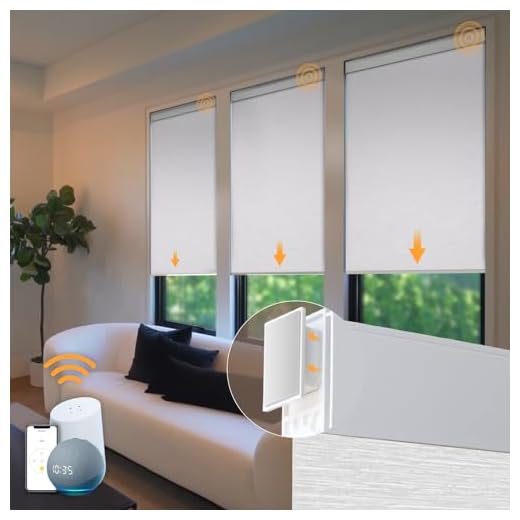
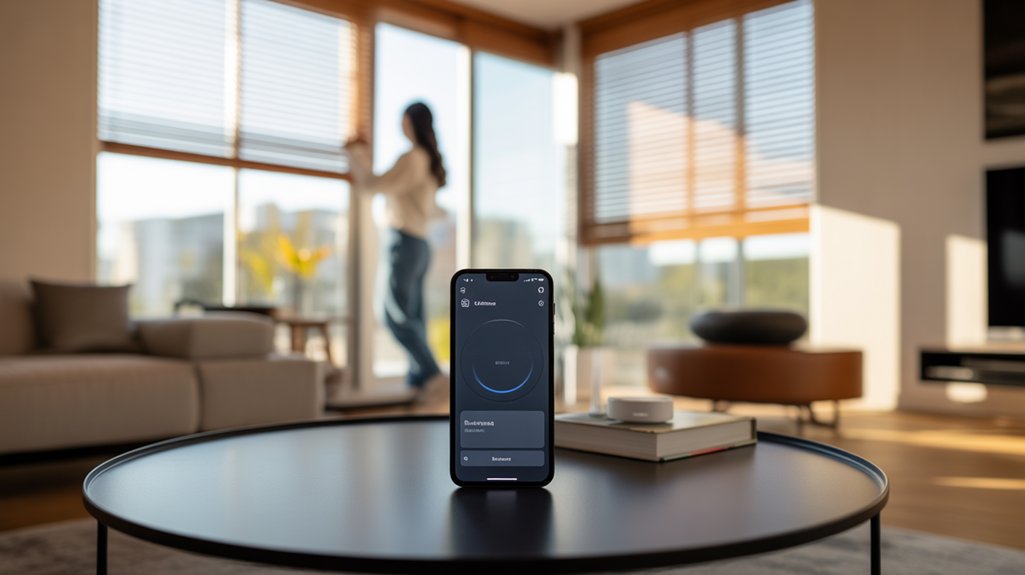
Set Up Automated Window Blinds and Shades
Automated window treatments change your home’s energy efficiency and privacy control through motorized systems that integrate smoothly with your existing smart home ecosystem.
You’ll need to select motor kits compatible with your blind or shade style—whether roller, venetian, or cellular—then configure them to respond to scheduled times, light sensors, or temperature thresholds.
The installation process requires mounting the motors, connecting them to your smart hub via Zigbee or Wi-Fi, and programming automation rules that align with your daily routines and environmental conditions.
Choose Compatible Motor Systems
Before purchasing any components, you’ll need to evaluate motor specifications against your existing window treatments’ weight, dimensions, and mounting configuration.
Motor compatibility determines installation success and operational reliability. Calculate torque requirements by measuring shade dimensions and fabric weight, then select motors exceeding minimum specifications by 20%.
Critical system integration factors include:
- Mounting brackets securing motors directly to window frames or wall surfaces with industrial-grade hardware
- Power supplies delivering consistent voltage through hardwired connections or rechargeable battery packs
- Control protocols enabling Z-Wave, Zigbee, or WiFi communication with your smart home hub
- Limit switches calibrating precise stopping points at fully extended and retracted positions
Cross-reference manufacturer datasheets with your measurements.
Verify voltage requirements, noise levels, and API documentation before committing to specific hardware.
Programming Schedules and Sensors
Motor installation establishes the mechanical foundation, but intelligent automation requires programmed logic to operate your shades without manual intervention.

You’ll configure time-based schedules that align with your daily routines—opening at sunrise, closing during peak heat hours, and adjusting for evening privacy.
Implement sensor calibration by connecting light sensors to measure ambient illumination levels, triggering shade movements at predetermined thresholds.
Temperature sensors enable climate-responsive automation, reducing HVAC loads by blocking solar heat gain.
For schedule enhancement, analyze your energy consumption patterns and adjust timing parameters to optimize efficiency gains.
Program conditional logic that overrides standard schedules based on occupancy detection or weather forecasts.
Advanced users can integrate machine learning algorithms that adapt shade positions based on historical data, delivering autonomous operation that anticipates your preferences while minimizing energy waste.
Install Smart Smoke and Carbon Monoxide Detectors
Smart smoke and carbon monoxide detectors convert passive safety devices into proactive monitoring systems that alert you anywhere, anytime. These advanced units deliver real-time notifications to your smartphone, enabling immediate response even when you’re away from home.
Traditional detectors sound alarms—smart detectors send urgent alerts to your phone, transforming home safety from reactive noise into instant, actionable intelligence.
Smart detector features that enhance your protection include:
- Interconnected sensors that trigger simultaneous alerts throughout your entire home when one unit detects danger
- Voice announcements identifying the specific hazard type and location, eliminating confusion during emergencies
- Battery status monitoring through your app, preventing those 3 AM chirping incidents
- Integration with existing smart home ecosystems to automatically open doors and illuminate escape routes
Installation tips for peak performance: mount detectors on ceilings or high on walls, positioning them away from bathrooms and kitchens to prevent false alarms.
Replace existing units by disconnecting power, removing the mounting bracket, and securing your new detector.
Test connectivity immediately and establish automated monthly testing protocols through your control app.
Create Motion-Activated Lighting for Hallways and Staircases
Motion-activated lighting converts dark hallways and staircases into automatically illuminated pathways that respond to your presence within milliseconds.
You’ll deploy passive infrared motion sensors strategically positioned to detect heat signatures across coverage zones spanning 15-20 feet. Mount these sensors at ideal heights—typically 7-8 feet—to enhance detection accuracy while minimizing false triggers.
Your lighting control system requires smart switches or relay modules compatible with your chosen automation platform. Wire the motion sensors to trigger these controllers, establishing response parameters through your hub’s interface.
Configure activation delays between 30-90 seconds to balance energy efficiency with user convenience.
Advanced implementations incorporate lux sensors that disable daytime activation, preventing unnecessary power consumption.
You’ll program different brightness levels for various time periods—full illumination during evening hours, dimmed pathways for nighttime navigation. This tiered approach enhances energy usage while maintaining complete navigational control throughout your home’s critical transit zones.
Set Up a Smart Irrigation System for Your Yard
While traditional irrigation wastes thousands of gallons through fixed schedules that ignore weather conditions, automated systems integrate real-time meteorological data to deliver precise water volumes exactly when your landscape requires them.
You’ll deploy moisture sensors at strategic root-zone depths, establishing a ground-truth feedback loop that eliminates guesswork. Smart watering controllers connect directly to weather APIs, automatically canceling cycles during precipitation events and adjusting runtime based on evapotranspiration rates.
Your implementation requires:
- Moisture sensors embedded in primary irrigation zones to monitor soil saturation levels and trigger valve activation only when thresholds demand intervention
- Zone-specific programming that accounts for sun exposure, plant species, and soil composition variations across your property
- Rain sensors and freeze detectors positioned strategically to override scheduled operations during adverse conditions
- Mobile dashboard access enabling real-time adjustments and consumption analytics from anywhere
The system pays for itself through reduced water bills while maintaining peak landscape health.
You’re engineering resource efficiency through data-driven automation.
Frequently Asked Questions
Do I Need to Hire an Electrician for Any of These Projects?
You won’t need an electrician for most projects involving plug-in devices, smart bulbs, or battery-powered sensors.
However, you’ll want professional help when dealing with hard-wired installations like smart switches, thermostats, or doorbell transformers.
Understanding your home’s wiring requirements and adhering to electrical codes guarantees safety considerations aren’t compromised.
If you’re replacing existing fixtures with similar smart versions, you can likely handle it yourself—but complex circuit modifications require licensed expertise to protect your investment.
Will These Smart Devices Work During a Power Outage or Internet Failure?
Most smart devices won’t function without power or internet, limiting your control when you need it most.
You’ll want battery backups for critical devices like smart locks and security cameras to maintain operation during outages.
Some devices offer offline functionality—programmable thermostats and Z-Wave systems can execute pre-set commands locally.
To enhance your system’s resilience, invest in UPS units for hubs and configure local automation rules that don’t require cloud connectivity.
Are These DIY Projects Safe for Renters or Require Landlord Permission?
Most DIY smart home projects you’ll implement are renter-friendly, requiring no permanent modifications.
Smart plugs, wireless sensors, and battery-powered devices won’t breach standard renter agreements. However, you’ll need landlord approval before installing hardwired solutions like smart switches, thermostats, or doorbell cameras.
Always review your lease terms first—you’re protecting your investment and security deposit.
Stick with removable, damage-free installations to maintain maximum flexibility while deploying state-of-the-art automation that alters your living space without compromising your tenant status.
How Much Does It Typically Cost to Complete All These Projects?
You’ll spend $200-$800 total, depending on your budget considerations and chosen project materials.
Entry-level implementations—smart plugs and lighting—cost $100-$200, while extensive automation with sensors, hubs, and multiple devices reaches $600-$800.
You’re investing in scalable infrastructure, not disposable tech. Premium components deliver superior performance and integration capabilities.
Strategic purchasing during sales events optimizes your buying power. Start with foundational systems, then expand your ecosystem systematically to maintain cost control while building strong automation.
Can I Integrate Devices From Different Brands Into One System?
You’ll absolutely achieve cross-brand integration through smart home hubs like Home Assistant or Hubitat.
These platforms break down brand ecosystems, forcing device compatibility across manufacturers. You’re leveraging protocols like Zigbee, Z-Wave, and Matter to unify disparate systems under your command.
Don’t let proprietary limitations constrain your setup—you’ll deploy middleware solutions that translate between ecosystems, giving you centralized control.
Master API integrations and you’ll orchestrate any device combination effortlessly.
Conclusion
You’ve now got the blueprint to change your house into an intelligent ecosystem that responds to your lifestyle. These weekend projects aren’t just about adding gadgets—they’re strategic upgrades that’ll slash energy costs, boost security, and simplify daily routines. Start with one system, master its integration, then expand your network. Remember: today’s smart home isn’t a luxury—it’s a living, breathing platform that evolves with emerging technologies. Your implementation begins now.
Related Articles You Might Like